


Being a Javascript developer knowing webpack is really important. Webpack is the most common and popular module bundled used in 2021. If you don't know what modules are, in JavaScript we have:
CommonJS
AMD: Async Module Definition
UMD: Universal Module Definition
ECMAScript Harmony (ES6)
You can read more here about Javascript modules
Webpack uses a few of these
- Common JS modules
- AMD modules
- CSS import -Images URL
- ES modules
If you remember building websites using HTML CSS and Vanilla Javascript, It was really hard to write good code, to separate the code into patterns like utils, functions, helpers and others, you will have to add a new script tag in a specific top to bottom order which requires you to do it carefully.
This was a real headache as working in a Team, this is one example where webpack solves code quality issue, using webpack and modern Javascript syntax, you can import and export code without adding a new script tag into your HTML, where webpack will compile all of the code and spit out a bundle.js file which stores your complete code.
More usage of webpack in modern Web Development.
- Opens doors to Micro Frontend
- Hot Module Refresh
- lets you use import and export syntax
- supports advanced code splitting webpack is not limited to frontend but is also used in backend development with Nodejs
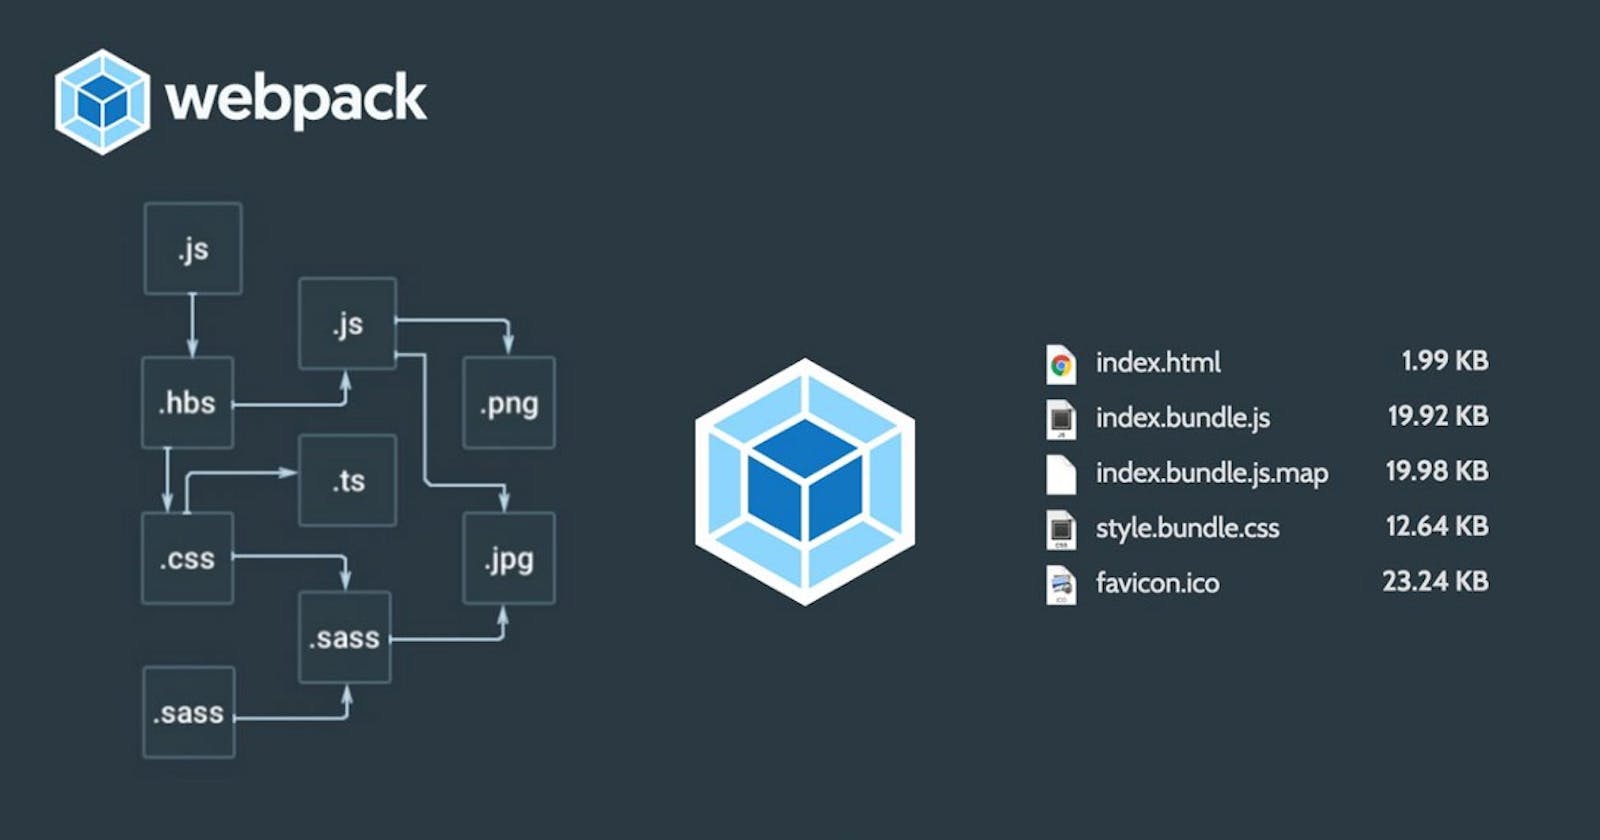
A short definition of webpack
You need to provide an input file to webpack ( ex: an HTML), and will output a complete bundle of HTML, CSS, Js, and everything other that you need to run your modern application.
Terms used in Webpack world
Entry point: An entry point for webpack is the starting point from which all the dependencies of a frontend project are collected.
Output: The output is where the resulting JavaScript and static files are collected during the build process.
Loaders: Loaders are third-party extensions that help webpack deal with various file extensions. (ex: .svg, .png etc..)
Plugins: Plugins are third-party extensions that can alter how webpack works
Mode: webpack has two modes of operations: development and production. The main difference between them is that production mode automatically applies minification and other optimizations to your JavaScript code.
Installing Webpack
- Note: You can do it locally or globally.
npm i -g webpack webpack-cli
Webpack Config.
The most basic file included for the proper functioning of webpack is webpack.config.js
The file is to added into your root directory of the project:
Here is an example config file for webpack
// webpack.config.js
var path = require('path');

module.exports = {
  entry: './assets/js/index.js',
  output: {
    filename: 'bundle.js',
    path: path.resolve(__dirname, 'dist')
  }
};
entry: is all about our main javascript file to be compiled for the working of our project.
output: In the output, we are required to add the filename and path where the final compiled files are to be added, here we have used dist/bundle.js file to be spitted from the compilation process, and this bundle.js will act as a script to out HTML file.
<script src="./dist/bundle.js"> </script>
Working with Styles/ CSS
A modern website includes CSS, Svg's, and a lot of other files and that is what webpack aims for, to provide such functionality webpack uses loaders to let you work with different files. Here is an example for .css files
In our Javascript code with can use:
import "./styles.css"
To let webpack work with .css we will need to add CSS loader to our webpack config file:
module.exports = {
 module: {
    rules: [
       { test: /\.css$/, use: ["style-loader", "css-loader"] },    }
     ]  }
 }
in the above example, css-loader interprets the importing of CSS and style-loader then is responsible for embedding a <style> tag into the HTML file.
The most commonly used loader in 2021 is babel which is responsible for converting your modern Javascript code into ES5 code.
Working with assets
We usually include files like gif, svg, .png and a lot other, in webpack 4 you need to have file-loader, raw-loader, and url-loader
module: {
  rules: [
    ...
    {
      test: /\.(?:ico|gif|png|jpg|jpeg)$/i,
      type: 'asset/resource',
    },
  ]
}
// asset/resource is used in place of file-loader
now we can use statements like:
import "./image.png"
The above code copies the image to the output path with a unique hashed name but the same extensions and adds it to bundle.js file where bundle.js is then added to HTML file back.
Using Sass Files
we can Process our SASS fileand transform it to CSS, using sass-loader, css-loader and style-loader:
module.exports = {
 module: {
   rules: [
          {        test: /\.scss$/,        use: [          'style-loader',          'css-loader',          'sass-  loader'        ]      }
     ]  }
}
Development Mode
// webpack.config.js
var path = require('path');

module.exports = {
  entry: './assets/js/index.js',
  mode: 'development',
  output: {
    filename: 'bundle.js',
    path: path.resolve(__dirname, 'dist')
  }
};
Using development mode in our webpack.config.js is really helpful during the development phase, you can later change it to production when doing the final bundle process.
Benefits of Development Mode:
- Fast build
- Provided detailed error messages
- No refactoring of comments, which leads to fast build
- Better debugging experience
Running Webpack
You can add the following script to your package.json file:
"scripts": {
   "run" : "webpack"
}
it will look for the webpack.config.js file in your root directory and following the input, output, loader files it will generate the desired bundle.
Watch Mode
Every time you change something in your file, the webpack will rebuild the bundle.
To set webpack in watch mode, add the following code to your package.json file
"scripts": {
   "watch" : "webpack --watch"
}